Injection Mold Assembly: Key Techniques, Procedures, and Quality Control
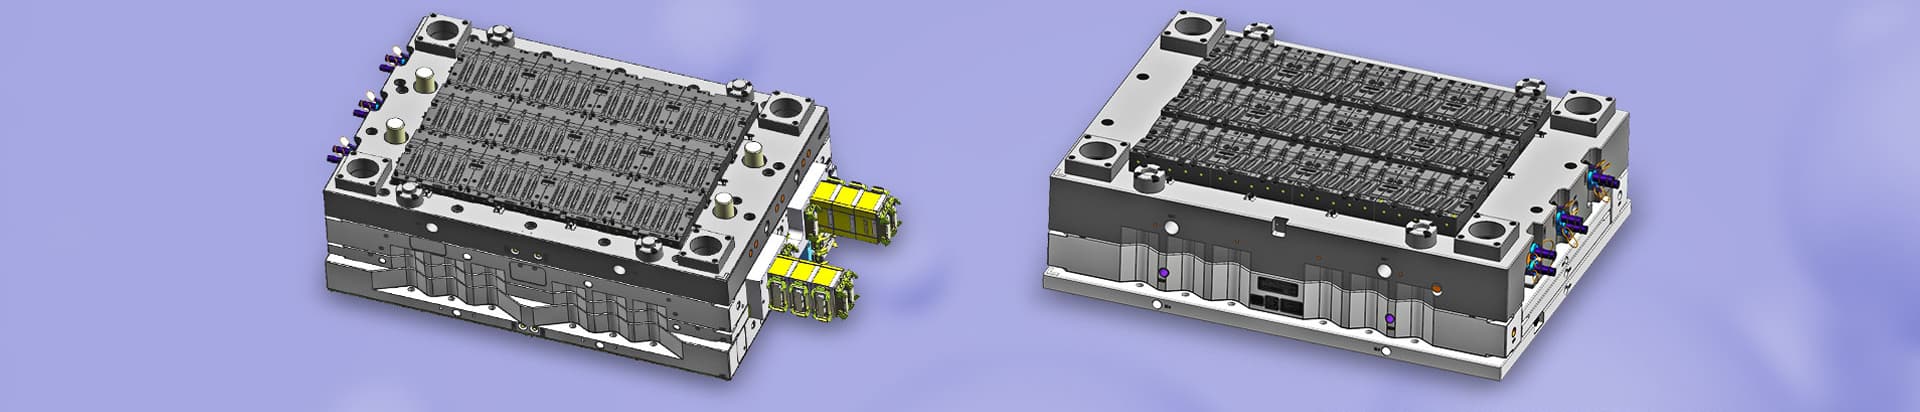
Injection mold assembly is a critical link in injection molding production. It directly impacts mold operational stability, injection-molded product quality, and production efficiency. A proper assembly requires not only that the fit precision between components meets design requirements but also rational layout of guiding, cooling, venting, and injection systems. This ensures the mold’s clamping, molding, opening, and ejection actions are coordinated and smooth. Below is a systematic explanation of assembly techniques covering five core sections: mold component identification, assembly sequence, alignment and gap adjustment, auxiliary system installation, and mold testing & tuning.
1. Identification and Preparation: Mold Structural Parts and Standard Components
Before assembly, accurately identify and inspect key components to ensure they meet technical specifications.
1.1 Mold Bases and Standard Parts
Mold Base: The framework that supports all mold parts. Check flatness and parallelism to ensure no warpage.
Guide Pillars & Bushings: Ensure precise alignment between the moving and fixed molds. The fit clearance should be within 0.01–0.03 mm. Insert guide pillars first, then bushings, to guarantee smooth sliding without wobble.
Ejector Pins & Springs: Core components of the ejection mechanism. Verify ejector pin length and spring stroke to avoid jamming or insufficient travel during ejection.
1.2 Core and Cavity Assemblies
Inserts, Slides, and Lifters: Used for parts requiring side core-pulling. Before installation, confirm the angle of the angle pin and ensure the reset mechanism is free of jamming.
Cooling Manifold: Ensure all corresponding cooling channels and quick connectors are intact and leak-free. Assemble first and conduct a pressure test.
2. Assembly Sequence and Techniques
Follow a logical assembly sequence to ensure precision and efficiency.
2.1 Fixed Mold Plate First
Place the fixed mold plate flat on the workbench and check its flatness.
Install locating pins, bushings, and cooling plates. Perform a seal test using low-pressure air or hydraulic pressure initially.
2.2 Core Component Installation
Insert the core assembly into the fixed mold plate. Adjust locating pins to ensure proper seating.
Preinstall the ejection mechanism, check the ejector pin stroke, and apply a thin layer of grease to the ejector retainer for smooth sliding.
2.3 Moving Mold Plate Alignment
Close the entire fixed mold plate with the movable plate, aligning via guide pillars on both sides.
Gradually clamp the mold lightly. Use feeler gauges to check if the parting surface gap is uniform (recommended range: 5–10 μm) and ensure no deviation or unevenness after clamping.
2.4 Slide and Lifter Installation
Install slide components on the moving mold side: first mount the guiding lifter mechanism, then tighten the lifter belt or connecting rod.
After clamping the mold, manually push the lifter rods to confirm smooth sliding of the slides without collision or interference.
3. Alignment and Gap Adjustment
Precise alignment and gap control prevent defects like flash and ensure molding stability.
3.1 Parting Surface Gap Tuning
Uneven parting surface gaps cause melt leakage (flash) or local flow resistance. Follow these standard steps:
After clamping, insert a 0.01 mm feeler gauge at the four corners and center of the parting surface to check gap consistency point by point.
If deviations are found, fine-tune the parallelism of the parting surface by adjusting the length of locating pins or adding/removing shims.
3.2 Ejector Pin Stroke Setting
The ejector pin stroke should be slightly longer than the product ejection stroke to avoid failure to eject (insufficient stroke) or ejector overshoot (excessive stroke).
Use stroke limiters or measuring nuts to lock the maximum ejector stroke, and verify through multiple tests.
4. Auxiliary System Installation and Verification
Auxiliary systems (cooling, venting, heating) directly affect molding quality and efficiency.
4.1 Cooling System
Connector Installation: Use quick connectors or compression fittings to connect water pipes. Conduct a leak test with low-pressure water first, then complete assembly after confirming no leakage.
Flow Rate and Temperature Difference: Control the temperature difference between the inlet and outlet of the cooling circuit at 5–10 ℃. Verify uniform flow in each circuit using a flow meter.
4.2 Venting System
4.3 Heating and Temperature Control
Heater Band Layout: Install heater bands and cover with high-temperature resistant silicone tubes in areas sensitive to temperature differences or prone to material sticking, avoiding excessive temperature gradients.
Temperature Sensors: Embed thermocouples at key mold positions (gate, weld line, thin-walled areas). Conduct a simulated control test after assembly.
5. Mold Testing and Tuning
Mold testing and tuning validate assembly quality and optimize process parameters.
5.1 First Article Mold Test
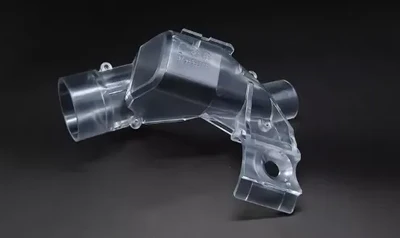
After assembly, conduct the first article mold test. Record molding parameters, ejection stroke, and product conditions in detail.
Inspect for defects such as flash, weld lines, shrinkage, and warpage. Adjust the parting surface gap, cooling time, or vent position based on defect locations.
5.2 Fine-Tuning and Mass Production Debugging
Injection Parameter Optimization: During mold testing, use Design of Experiments (DOE) to optimize injection speed, pressure, and holding pressure curves for stable molding.
Automated Monitoring Integration: Connect mold assembly data with the injection molding machine’s monitoring system to achieve real-time mold temperature and pressure monitoring, improving subsequent switching efficiency.
5.3 Regular Maintenance
6. Common Issues and Precautions
6.1 Assembly Environment
6.2 Tightening Torque
6.3 Documentation and Traceability
Conclusion
Through systematic assembly and tuning of the six key links above, the injection mold’s clamping precision, venting efficiency, cooling uniformity, and ejection smoothness are effectively guaranteed. This provides a solid foundation for high-quality, stable
injection molding production. Rational application of these assembly techniques can significantly shorten the mold testing cycle, reduce maintenance costs, and extend mold service life.


 Call us on:
  Email Us:
  1st Floor, Block1, No.3 Beiting Road, Houting Community, ShaJing Street, Bao'An District, Shenzhen City, Guangdong Province, China
  English
 Deutsch
 italiano
 русский
 français
 română
 العربية
 Español
 Polska
 日本語
日本語 한국어
한국어